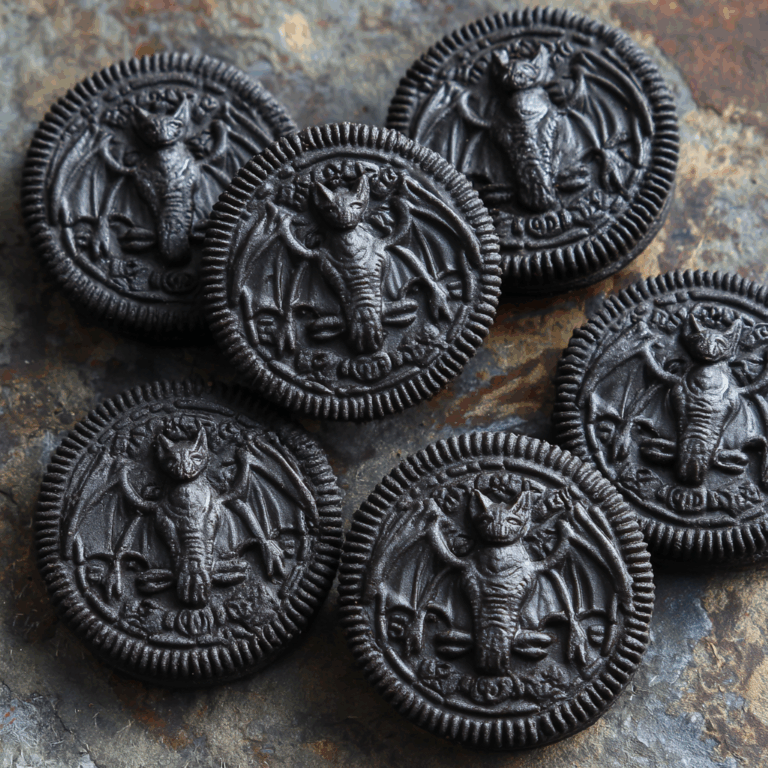
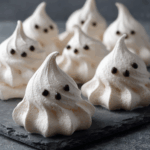
Ghost-Shaped Meringue Cookies
The Ghost-Shaped Meringue Cookies are delightful treats perfect for spooky celebrations! Their light and airy texture, along with the fun ghost shape, makes them a hit among kids and adults alike. Whether it’s Halloween or a themed party, these cookies are not only visually appealing but also incredibly easy to make. Get ready to impress your guests with these sweet, whimsical delights!
Why You’ll Love This Recipe
- Easy to Make: This recipe requires minimal ingredients and simple steps, making it accessible for bakers of all skill levels.
- Kid-Friendly Fun: Kids will love helping pipe out the ghost shapes and decorating them with spooky faces.
- Versatile Treat: Perfect for Halloween parties, school events, or just a fun afternoon snack!
- Light and Airy: These cookies are crunchy on the outside and soft on the inside, creating a delightful texture.
- Customizable Decorations: Use your creativity to decorate each ghost differently with edible markers or sprinkles.

Tools and Preparation
To create these charming Ghost-Shaped Meringue Cookies, having the right tools is essential. Here’s what you’ll need:
Essential Tools and Equipment
- Stand mixer or hand whisk
- Mixing bowl
- Parchment paper
- Baking sheets
- Black edible marker
Importance of Each Tool
- Stand mixer or hand whisk: A stand mixer makes whipping egg whites effortless and ensures they reach firm peaks quickly.
- Parchment paper: Prevents the meringue from sticking to the baking sheets, allowing for easy removal after baking.
Ingredients
For the Meringue Cookies
- 3 medium egg whites
- 170 g (¾ cup) sugar
- 1 teaspoon vanilla extract or 1 packet vanilla sugar
- ½ teaspoon vinegar or a squeeze of lemon juice
How to Make Ghost-Shaped Meringue Cookies
Step 1: Preheat the Oven
Set your oven to 95°C (200°F) to prepare for slow baking.
Step 2: Beat Egg Whites
Using either a stand mixer or a hand whisk:
1. Begin beating the egg whites until firm peaks form. This may take several minutes.
Step 3: Add Sugar Gradually
While continuing to beat:
1. Slowly add sugar, a little at a time.
2. Keep beating until fully incorporated.
Step 4: Add Vanilla & Acid
Mix in:
1. The vanilla extract (or vanilla sugar).
2. The vinegar (or lemon juice) until well combined.
Step 5: Beat Until Glossy
Continue whipping:
– Aim for a shiny, stiff meringue that feels smooth when rubbed between your fingers.
Step 6: Pipe Ghost Shapes
On two parchment-lined baking sheets:
– Carefully pipe small ghost shapes using the meringue mixture.
Step 7: Bake
Bake in the preheated oven for:
– 90–120 minutes until cookies can be lifted easily off the parchment paper.
Step 8: Cool & Decorate
Once baked:
– Allow cookies to cool completely before decorating.
– Use a black edible marker to draw eyes and mouths on each ghost.
Step 9: Serve & Enjoy
Watch as everyone enjoys these spooky treats! Perfect for sharing at gatherings or keeping as festive snacks at home.
How to Serve Ghost-Shaped Meringue Cookies
These delightful Ghost-Shaped Meringue Cookies are perfect for Halloween parties or any spooky gathering. Their whimsical shapes and sweet flavors will charm both kids and adults alike.
Creative Ways to Serve
- On a Dessert Table: Place these ghostly treats on a colorful dessert table surrounded by other Halloween-themed snacks for a festive display.
- As Party Favors: Package individual cookies in clear bags tied with Halloween ribbons, making great take-home treats for guests.
- With Hot Drinks: Serve alongside hot chocolate or apple cider to create a cozy treat pairing that’s perfect for chilly evenings.
- Ghostly Ice Cream Sandwiches: Use two meringue cookies to sandwich your favorite ice cream flavor, creating a spooky dessert experience.
- Decorated Plates: Arrange the cookies on plates with edible decorations, such as candy corn or chocolate eyeballs, for added fun.
- Themed Cupcake Toppers: Use smaller meringues as toppers for cupcakes to add an extra spooky touch to your baked goods.
How to Perfect Ghost-Shaped Meringue Cookies
To achieve the best results with your Ghost-Shaped Meringue Cookies, follow these helpful tips that ensure they come out just right.
- Use Fresh Egg Whites: Fresh egg whites whip up better and yield a fluffier meringue. Ensure they are at room temperature for optimal results.
- Gradual Sugar Addition: Add sugar slowly while beating the egg whites. This helps create a stable meringue that holds its shape well.
- Check for Stiff Peaks: Beat until you achieve stiff peaks; this means the meringue should stand tall without drooping when the whisk is pulled out.
- Avoid Humidity: Make these cookies on a dry day. Humidity can affect the texture of the meringue, making it sticky instead of crisp.
- Cool Completely Before Decorating: Let the cookies cool entirely before decorating them. This prevents any melting of decorations due to residual heat.
Best Side Dishes for Ghost-Shaped Meringue Cookies
Pair your delicious Ghost-Shaped Meringue Cookies with these side dishes to create an unforgettable spooky spread.
- Pumpkin Soup: A creamy pumpkin soup offers a warm contrast to the lightness of the meringues—perfect for fall gatherings.
- Spooky Veggie Platter: Serve a platter of assorted vegetables shaped like creepy creatures, paired with a tasty dip for healthy snacking options.
- Cheese Board: Create a cheese board featuring various cheeses, crackers, and fruits that complement the sweetness of the cookies.
- Fruit Salad: A colorful fruit salad adds freshness and balances out the sweetness of the meringues with vibrant flavors.
- Chocolate-Dipped Pretzels: These sweet and salty treats provide an enjoyable crunch and are easy to make ahead of time.
- Candy Corn Mix: Combine candy corn with nuts and dried fruits for a sweet snack mix that echoes Halloween traditions while complementing desserts.
Common Mistakes to Avoid
Making Ghost-Shaped Meringue Cookies can be a fun and rewarding experience, but it’s essential to avoid common pitfalls.
- Bold Preparation: Not preheating the oven can lead to uneven baking. Always preheat your oven to ensure consistent results.
- Bold Egg Whites: Failing to beat egg whites to firm peaks results in flat cookies. Beat until stiff peaks form for the best texture.
- Bold Gradual Sugar Addition: Adding sugar too quickly can deflate the meringue. Incorporate sugar slowly while beating for a stable mixture.
- Bold Mixing Vanilla Properly: Skipping vinegar or lemon juice may affect meringue stability. Always include an acid for better structure.
- Bold Cooling Time: Removing cookies too early can cause them to collapse. Allow them to cool completely before decorating.
Storage & Reheating Instructions
Refrigerator Storage
- Store cookies in an airtight container.
- They will last up to 1 week in the refrigerator.
Freezing Ghost-Shaped Meringue Cookies
- You can freeze cookies for up to 2 months.
- Use a freezer-safe container, separating layers with parchment paper.
Reheating Ghost-Shaped Meringue Cookies
- Oven: Preheat your oven to a low temperature (around 90°C or 194°F) and warm the cookies for about 5 minutes.
- Microwave: Use short bursts on low power, but this is not recommended as it can alter texture.
- Stovetop: Avoid reheating on the stovetop as it may cause melting or sogginess.

Frequently Asked Questions
Here are some common questions about making Ghost-Shaped Meringue Cookies.
Can I use different flavors for my Ghost-Shaped Meringue Cookies?
Yes! You can experiment with different extracts like almond or lemon instead of vanilla for unique flavors.
How do I know when my meringue is ready?
Your meringue is ready when it holds stiff peaks and feels smooth without graininess when rubbed between your fingers.
Can I decorate Ghost-Shaped Meringue Cookies differently?
Absolutely! Get creative with edible decorations like icing, sprinkles, or melted chocolate for various ghostly effects.
What if my Ghost-Shaped Meringue Cookies turn out sticky?
Sticky cookies often indicate they weren’t baked long enough. Ensure they lift off easily from parchment before removing them from the oven.
Final Thoughts
Ghost-Shaped Meringue Cookies are not only adorable but also versatile treats that you can customize to match any occasion. Feel free to experiment with flavors and decorations, making these spooky delights perfect for Halloween or any festive gathering!
Ghost-Shaped Meringue Cookies
Ghost-Shaped Meringue Cookies are whimsical treats that bring a touch of spooky fun to any celebration! These light and airy cookies, shaped like playful ghosts, are perfect for Halloween parties or just a delightful afternoon snack. With their crunchy exterior and soft interior, they charm both kids and adults alike. Plus, they’re incredibly easy to make with just a few simple ingredients you likely already have at home. Impress your guests with these sweet, customizable delights that are sure to steal the show at your next gathering!
- Prep Time: 15 minutes
- Cook Time: 90–120 minutes
- Total Time: 0 hours
- Yield: Approximately 12 cookies 1x
- Category: Dessert
- Method: Baking
- Cuisine: American
Ingredients
- 3 medium egg whites
- 170 g (¾ cup) sugar
- 1 teaspoon vanilla extract or 1 packet vanilla sugar
- ½ teaspoon vinegar or a squeeze of lemon juice
Instructions
- Preheat your oven to 95°C (200°F).
- In a mixing bowl, beat the egg whites until firm peaks form.
- Gradually add sugar while continuing to beat until fully incorporated.
- Mix in vanilla and vinegar until well combined.
- Whip until the meringue is glossy and smooth.
- Pipe ghost shapes onto parchment-lined baking sheets.
- Bake for 90–120 minutes until easily lifted from parchment.
- Allow cookies to cool completely before decorating with a black edible marker.
Nutrition
- Serving Size: 1 cookie (10g)
- Calories: 40
- Sugar: 9g
- Sodium: 0mg
- Fat: 0g
- Saturated Fat: 0g
- Unsaturated Fat: 0g
- Trans Fat: 0g
- Carbohydrates: 10g
- Fiber: 0g
- Protein: 0g
- Cholesterol: 0mg